


Although the CDN method is quick and easy, it has many limitations:
is not optimized, so we have to load the entire Tailwind CSS and TW Elements code, even if we only use a small part of it
we can't take full advantage of customization
we can't take full advantage of theming
we don't have live reload, so we have to manually refresh the browser after every change
and it lacks a lot of other valuable features, which we will learn about in later lessons
That's why we need a tool that will provide us with all these things. That tool is Vite.
About Vite

Vite is a modern, lightning-fast build tool and development server for web applications, created by Evan You, the creator of Vue.js.
Leveraging the power of native ES modules, Vite offers an exceptional development experience with features like instantaneous hot module replacement (HMR), efficient production builds, and out-of-the-box support for various frameworks and libraries.
Its greatness lies in its ability to significantly speed up the development process, reduce configuration overhead, and provide a smooth, responsive workflow. By enhancing productivity and improving developer experience, Vite has become one of the most popular choice for building modern web applications.
But enough of this theory. Let's check in practice what is really so great about Vite.
Step 1 - install Node.js
Skip this step if you already have Node.js installed.
To run Vite on your computer you need Node.js.
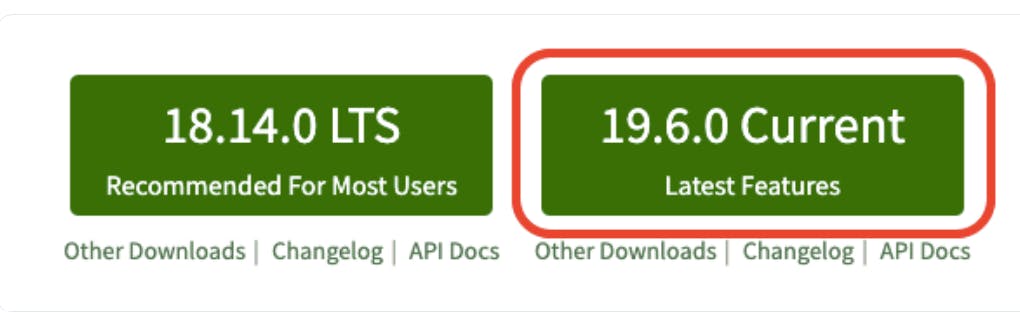
To install it go to the nodejs.org and click the button to download it.
You will see 2 buttons there - LTS on the left, and Current on the right. It does not really matter what version do you chose, but just to simply not to overthink it choose the version on the right ("Current").
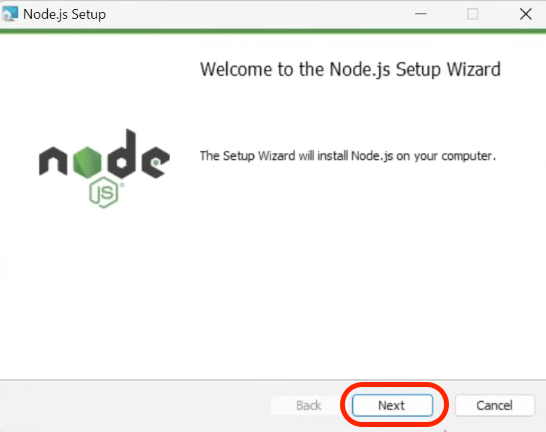
Once downloaded, run the file, accept the terms and just click "Next" until the installation is complete.
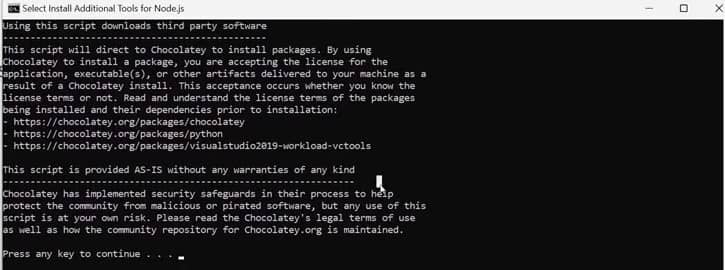
After the installation is complete, you can see the terminal window as in the screenshot below. Click any button to proceed.
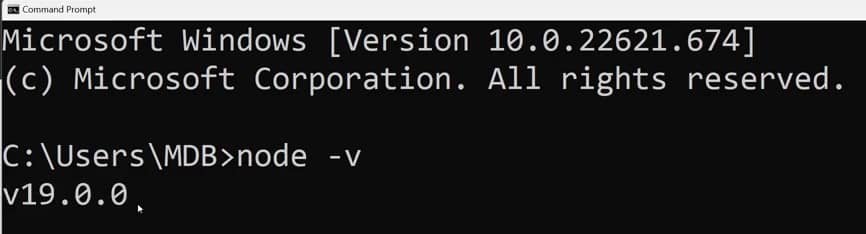
Now let's check if the installation was successful. Launch the terminal (if you are using Windows, type "cmd" in the system search and run Command Line app / on MacOS, search for the "terminal" application).
Then type node -v in the terminal and click enter. You should see the version of the installed node.js software like on the screen below (note your version may be different as an update may have come out since this tutorial was published).
Step 2 - create new project
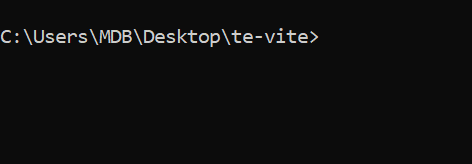
To begin with, we need to create a new folder and a new Vite project to put in that folder.
Open terminal, navigate to the path where you want to put your project and type the following command:
npm create vite@latest te-vite
Then select the Vanilla framework (meaning pure JavaScript) and the JavaScript variant.
At the end type cd te-vite in the terminal to go to the folder with our new project.
Below is a screenshot from my terminal. As you can see, I first went to my desktop and then followed the steps listed above.
Note: If you feel insecure in the terminal, don't worry. I wrote a short tutorial on basic commands. Read it and the terminal will no longer be a problem for you. Terminal basics
Step 3 - install Tailwind CSS and its dependencies
Now copy and paste the following commands into the terminal:
npm install -D tailwindcss postcss autoprefixer npx tailwindcss init -p
npm install -D tailwindcss postcss autoprefixer will install Tailwind and all the necessary dependencies
npx tailwindcss init -p will create tailwind.config.cjs file.

Step 4 - update Tailwind config file
Now open the entire te-vite folder with code editor and go to the te-vite/tailwind.config.js file. Then update it so it looks like this:
/** @type {import('tailwindcss').Config} */
module.exports = {
  content: [
    "./index.html",
    "./src/**/*.{js,ts,jsx,tsx}",
  ],
  theme: {
    extend: {},
  },
  plugins: [],
}
This way we define where our files are to be stored.
Step 5 - update style.css file
Next, we need to add the necessary Tailwind directives to our style.css file to be able to use Tailwind classes on your website.
You will find style.css in the root of our project.
Delete all the code you find there and replace it with the following:
@import url("https://fonts.googleapis.com/css?family=Roboto:300,400,500,700,900&display=swap");
@tailwind base;

@layer base {
  html {
    @apply text-[#4f4f4f];
  }
  html.dark {
    @apply text-neutral-50;
    @apply bg-neutral-800;
  }
}

@tailwind components;
@tailwind utilities;
Step 6 - link the css file inside the index.html
Go to the index.html file and just above closing </head> tag add link to the style.css file:
<head>
  ...
  <link rel="stylesheet" href="style.css" />
</head>
Step 7 - test if it works
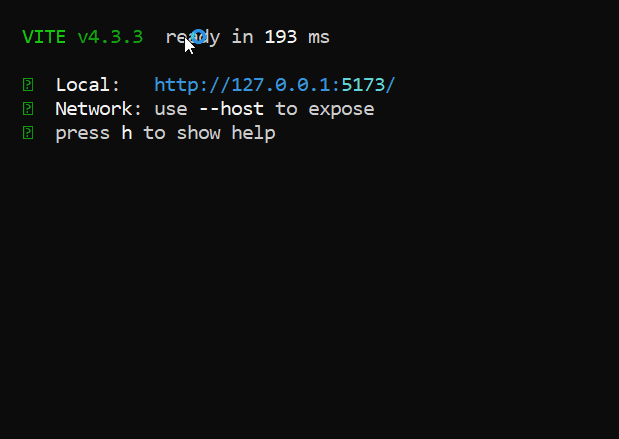
Let's see if we set up everything correctly. In the terminal type the command:
npm run dev
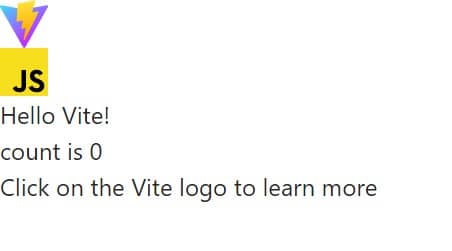
After entering the above command, Vite should start a local server on your computer and give you an address where you can see your application.
As you can see above, in my case it is the following address:
When you go to the given link, you should see your application, which to be honest looks a bit broken:
Let's fix it. Go to index.html file and remove the following line:
<div id="app"></div>
Replace it with the following code:
<div
class="mx-auto mt-6 flex max-w-sm items-center space-x-4 rounded-xl bg-white p-6 shadow-lg">
<div class="shrink-0">
<img
class="h-12 w-12"
src="https://mdbootstrap.com/img/new/avatars/1.jpg"
alt="ChitChat Logo" />
</div>
<div>
<div class="text-xl font-medium text-black">Wow, it works!</div>
<p class="text-slate-500">
This alert is build with Tailwind CSS classes
</p>
</div>
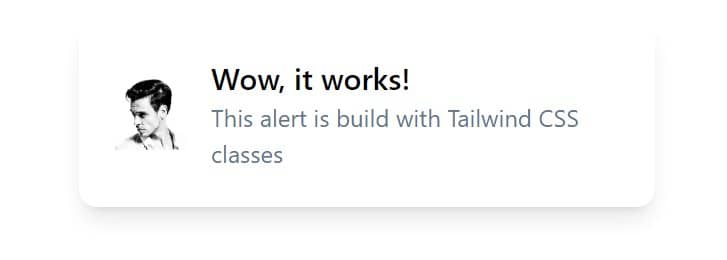
</div>
If you see a panel like this after saving the file in your browser, then the Tailwind classes are working as they should, so everything has been installed correctly.
Step 8 - install TW Elements
Now that Tailwind CSS has been successfully installed, it's time to install TW Elements.
Open a terminal and press ctrl + c (or command + c on macOS) to abort the current process. (sometimes you have to click 2 times for it to be interrupted).
Then enter the following command to install TW Elements:
npm install tw-elements
Now we need to change Tailwind config file. Go to tailwind.config.js and update is as follows:
/** @type {import('tailwindcss').Config} */
module.exports = {
  content: [
    "./index.html",
    "./src/**/*.{html,js}",
    "./node_modules/tw-elements/js/**/*.js",
  ],
  plugins: [require("tw-elements/plugin.cjs")],
  darkMode: "class"
};
COPY
Step 9 - test if it works
We've almost got it all! Now let's check if TW Elements works as it should.
Restart Vite by typing this command again:
npm run dev
COPY
Now go to the carousel documentation and copy HTML code of the basic example:
Next, paste the code of the carousel to the index.html and replace with it the panel that we added in step 7 to check if Tailwind classes work properly:
<div
  id="carouselExampleCaptions"
  class="relative"
  data-twe-carousel-init
  data-twe-carousel-slide>
  <!--Carousel indicators-->
  <div
    class="absolute bottom-0 left-0 right-0 z-[2] mx-[15%] mb-4 flex list-none justify-center p-0"
    data-twe-carousel-indicators>
    <button
      type="button"
      data-twe-target="#carouselExampleCaptions"
      data-twe-slide-to="0"
      data-twe-carousel-active
      class="mx-[3px] box-content h-[3px] w-[30px] flex-initial cursor-pointer border-0 border-y-[10px] border-solid border-transparent bg-white bg-clip-padding p-0 -indent-[999px] opacity-50 transition-opacity duration-[600ms] ease-[cubic-bezier(0.25,0.1,0.25,1.0)] motion-reduce:transition-none"
      aria-current="true"
      aria-label="Slide 1"></button>
    <button
      type="button"
      data-twe-target="#carouselExampleCaptions"
      data-twe-slide-to="1"
      class="mx-[3px] box-content h-[3px] w-[30px] flex-initial cursor-pointer border-0 border-y-[10px] border-solid border-transparent bg-white bg-clip-padding p-0 -indent-[999px] opacity-50 transition-opacity duration-[600ms] ease-[cubic-bezier(0.25,0.1,0.25,1.0)] motion-reduce:transition-none"
      aria-label="Slide 2"></button>
    <button
      type="button"
      data-twe-target="#carouselExampleCaptions"
      data-twe-slide-to="2"
      class="mx-[3px] box-content h-[3px] w-[30px] flex-initial cursor-pointer border-0 border-y-[10px] border-solid border-transparent bg-white bg-clip-padding p-0 -indent-[999px] opacity-50 transition-opacity duration-[600ms] ease-[cubic-bezier(0.25,0.1,0.25,1.0)] motion-reduce:transition-none"
      aria-label="Slide 3"></button>
  </div>

  <!--Carousel items-->
  <div
    class="relative w-full overflow-hidden after:clear-both after:block after:content-['']">
    <!--First item-->
    <div
      class="relative float-left -mr-[100%] w-full transition-transform duration-[600ms] ease-in-out motion-reduce:transition-none"
      data-twe-carousel-active
      data-twe-carousel-item
      style="backface-visibility: hidden">
      <img
        src="https://tecdn.b-cdn.net/img/Photos/Slides/img%20(15).jpg"
        class="block w-full"
        alt="..." />
      <div
        class="absolute inset-x-[15%] bottom-5 hidden py-5 text-center text-white md:block">
        <h5 class="text-xl">First slide label</h5>
        <p>Some representative placeholder content for the first slide.</p>
      </div>
    </div>
    <!--Second item-->
    <div
      class="relative float-left -mr-[100%] hidden w-full transition-transform duration-[600ms] ease-in-out motion-reduce:transition-none"
      data-twe-carousel-item
      style="backface-visibility: hidden">
      <img
        src="https://tecdn.b-cdn.net/img/Photos/Slides/img%20(22).jpg"
        class="block w-full"
        alt="..." />
      <div
        class="absolute inset-x-[15%] bottom-5 hidden py-5 text-center text-white md:block">
        <h5 class="text-xl">Second slide label</h5>
        <p>Some representative placeholder content for the second slide.</p>
      </div>
    </div>
    <!--Third item-->
    <div
      class="relative float-left -mr-[100%] hidden w-full transition-transform duration-[600ms] ease-in-out motion-reduce:transition-none"
      data-twe-carousel-item
      style="backface-visibility: hidden">
      <img
        src="https://tecdn.b-cdn.net/img/Photos/Slides/img%20(23).jpg"
        class="block w-full"
        alt="..." />
      <div
        class="absolute inset-x-[15%] bottom-5 hidden py-5 text-center text-white md:block">
        <h5 class="text-xl">Third slide label</h5>
        <p>Some representative placeholder content for the third slide.</p>
      </div>
    </div>
  </div>

  <!--Carousel controls - prev item-->
  <button
    class="absolute bottom-0 left-0 top-0 z-[1] flex w-[15%] items-center justify-center border-0 bg-none p-0 text-center text-white opacity-50 transition-opacity duration-150 ease-[cubic-bezier(0.25,0.1,0.25,1.0)] hover:text-white hover:no-underline hover:opacity-90 hover:outline-none focus:text-white focus:no-underline focus:opacity-90 focus:outline-none motion-reduce:transition-none"
    type="button"
    data-twe-target="#carouselExampleCaptions"
    data-twe-slide="prev">
    <span class="inline-block h-8 w-8">
      <svg
        xmlns="http://www.w3.org/2000/svg"
        fill="none"
        viewBox="0 0 24 24"
        stroke-width="1.5"
        stroke="currentColor"
        class="h-6 w-6">
        <path
          stroke-linecap="round"
          stroke-linejoin="round"
          d="M15.75 19.5L8.25 12l7.5-7.5" />
      </svg>
    </span>
    <span
      class="!absolute !-m-px !h-px !w-px !overflow-hidden !whitespace-nowrap !border-0 !p-0 ![clip:rect(0,0,0,0)]"
      >Previous</span
    >
  </button>
  <!--Carousel controls - next item-->
  <button
    class="absolute bottom-0 right-0 top-0 z-[1] flex w-[15%] items-center justify-center border-0 bg-none p-0 text-center text-white opacity-50 transition-opacity duration-150 ease-[cubic-bezier(0.25,0.1,0.25,1.0)] hover:text-white hover:no-underline hover:opacity-90 hover:outline-none focus:text-white focus:no-underline focus:opacity-90 focus:outline-none motion-reduce:transition-none"
    type="button"
    data-twe-target="#carouselExampleCaptions"
    data-twe-slide="next">
    <span class="inline-block h-8 w-8">
      <svg
        xmlns="http://www.w3.org/2000/svg"
        fill="none"
        viewBox="0 0 24 24"
        stroke-width="1.5"
        stroke="currentColor"
        class="h-6 w-6">
        <path
          stroke-linecap="round"
          stroke-linejoin="round"
          d="M8.25 4.5l7.5 7.5-7.5 7.5" />
      </svg>
    </span>
    <span
      class="!absolute !-m-px !h-px !w-px !overflow-hidden !whitespace-nowrap !border-0 !p-0 ![clip:rect(0,0,0,0)]"
      >Next</span
    >
  </button>
</div>
COPY
After saving the file you should see a carousel:

The problem is it doesn't work properly. When you click the arrow the slides don't change.
What happened?
Do you remember how in the previous lesson, where we used the CDN method, I mentioned that in addition to the HTML code in the example, there is also JavaScript code that initializes this component?
In the CDN method, we didn't have to initialize the components and everything worked with just HTML. However, when using Vite this additional initialization is necessary.
This may sound like one extra unnecessary step, but don't be fooled. Thanks to this initialization, we can indicate which exact components we want to import, thanks to which our project will contain only the code it needs.
This is of great importance for optimization and performance.
So let's initialize the carousel component in our project. Go to the main.js file (you will find it in the root folder of your project) and remove the entire code from this file.
Next go back to the carousel documentation, click "JavaScript" tab and copy JavaScript code
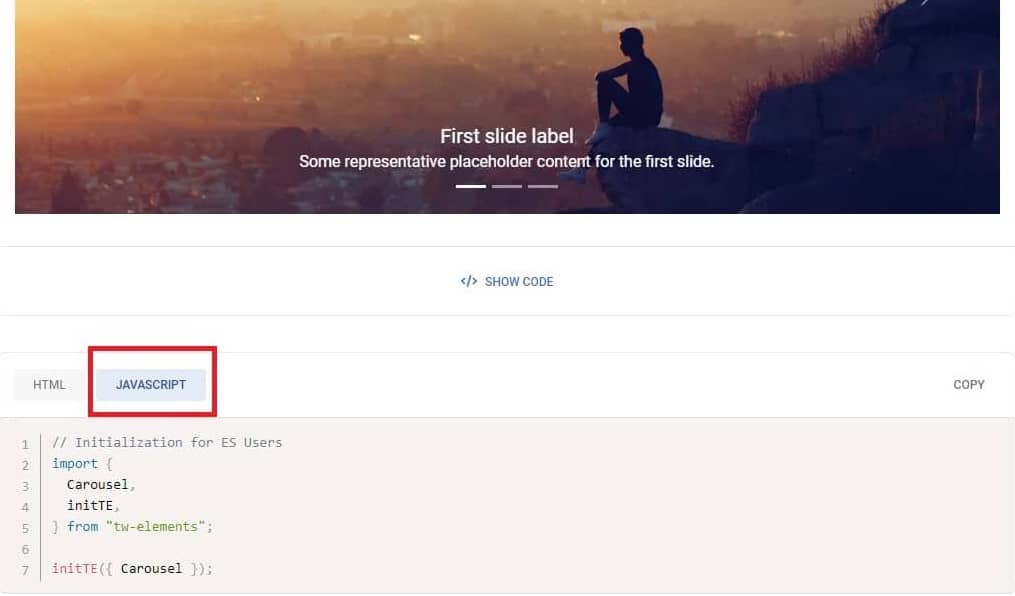
Then paste it to the main.js file.
// Initialization for ES Users
import {
  Carousel,
  initTWE,
} from "tw-elements";

initTWE({ Carousel });
After saving the file you should see a working carousel. After clicking on the arrows, the slides should change, which means that both the Tailwind Elements styles and the necessary JavaScript work correctly.
.jpg)